Making a Reservation
Please remember that the sole purpose of the PO is to encumber funds and enable internal charges. To make a reservation on the MRIF scanner please do so on the online booking system.
Preparing to Create the Requisition
Before you start you will need the following:
- Accounting information: Department ID, Fund Code, project codes, other appropriate chart field values.
- Encumbrance amount on the PO
- MRIF Supplier number in OMNI: AUX0000020
- Category Code: AUX_MED0000004
Creating the Requisition
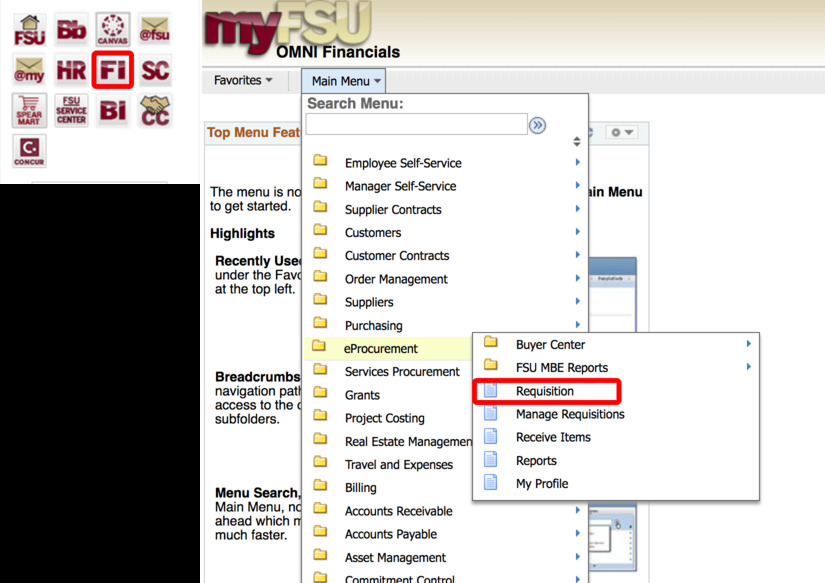
- Login to https://my.fsu.edu/
- In the myFSU Links, click on FI icon and navigate as follows (as shown below): Main Menu → eProcurement → Requisition.
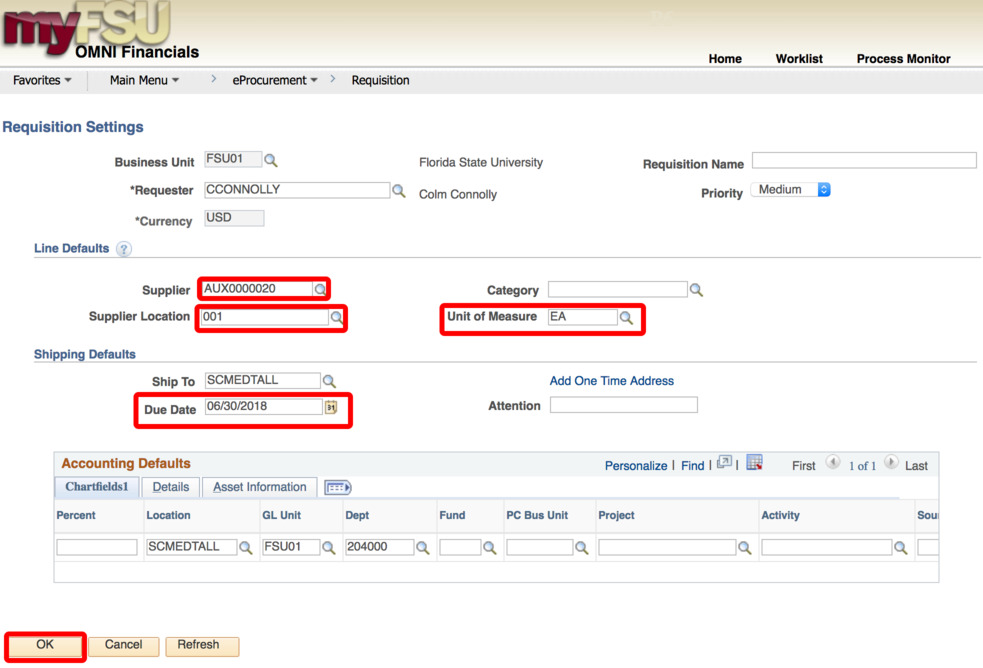
- When you click on Requisition, the Requisition Setting page will load.
- In the Requisition Setting page enter the following information:
- In the Supplier field, enter the MRIF supplier number AUX0000020
- In the Supplier Location field enter 001
- Enter a Unit of Measure. For internal requisitions, always choose “EA.”
- Enter a due date. For year-long, open ended PO’s, use 6/30 of the appropriate fiscal year. You should use the project end date if the project ends before the end of this fiscal year.
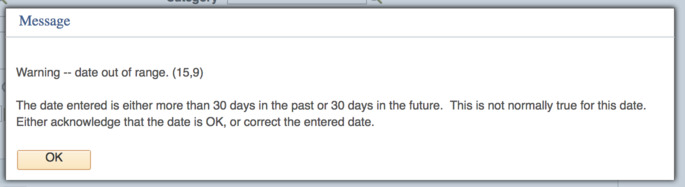
- If you receive a warning about the date being more than 30 days in the past or 30 days in the future, click OK.
- When finished, click OK at the bottom of the page.
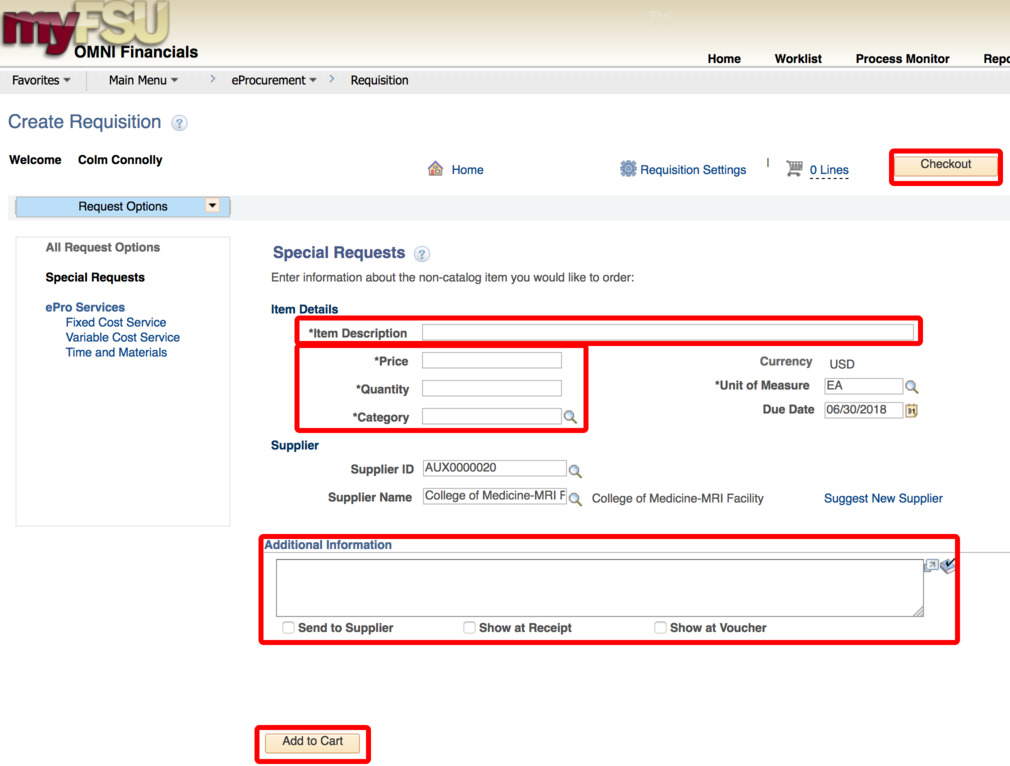
- You will be returned to the Create Requisition Select Special Requests to begin adding the individual lines for your requisition (if you are directed to the Requisition Settings page again after selecting Special Requests, click “OK” to proceed).
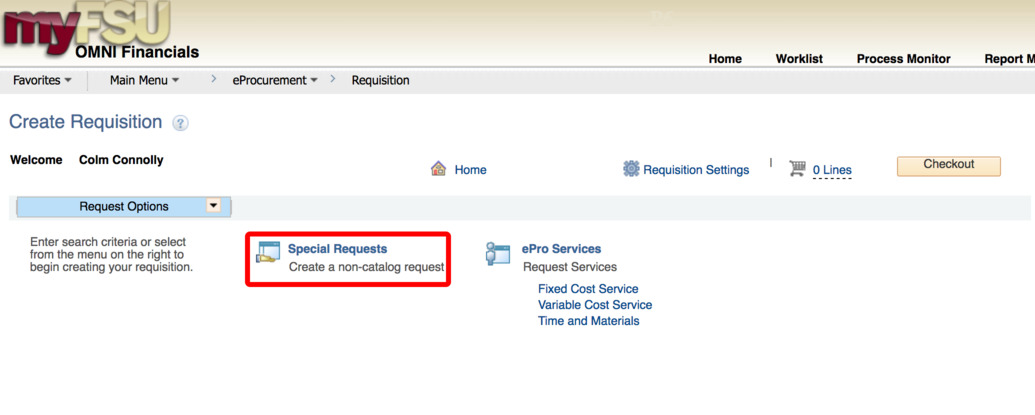
- Create line(s) for your services as appropriate.
- Enter the item description as desired
- Enter the price and Quantity
- Price: equal to the dollar amount you plan to spend for the duration of the PO
- Quantity: 1 Note: quantity should always equal 1
- Enter the category code: For MRIF the correct code is AUX_MED0000004
- Add notes as needed in the “Additional Information” field. This information is for your research purposes only.
- You will see a screen for a new, blank line. Create additional lines as needed for other category codes for this auxiliary. Please group all activity per category code onto one line versus spreading it out over multiple lines w when the category code is the same unless you are adding multiple budget combos in the same category code. Note: projects must be on their own requisitions.
- When lines for all applicable goods/services have been added and you are ready to check out, click the Checkout button at the top of the page.
- You will be returned to the Checkout – Review and Submit
- Flag all lines in the requisition as Amount Only. This is an important step, without it your PO encumbrance will not be correct after your PO is expended.
- Select the icon under the “Details” column for the line:

- On the “Line Details” page, select the checkbox for “Amount Only”.
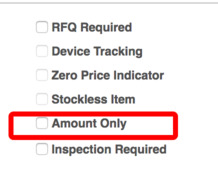
- Scroll to the bottom of the page and select “OK”.
- A message will pop up indicating that your quantity will be set to 1; this is ok. Select “Yes”.
- Repeat steps 15.1 – 15.5 for all lines in your PO.
- Select the icon under the “Details” column for the line:
- Enter the accounting information for each line in your PO as shown below:
- Expand the lines using the small grey arrows and then select the “Chartfields 2” tab.
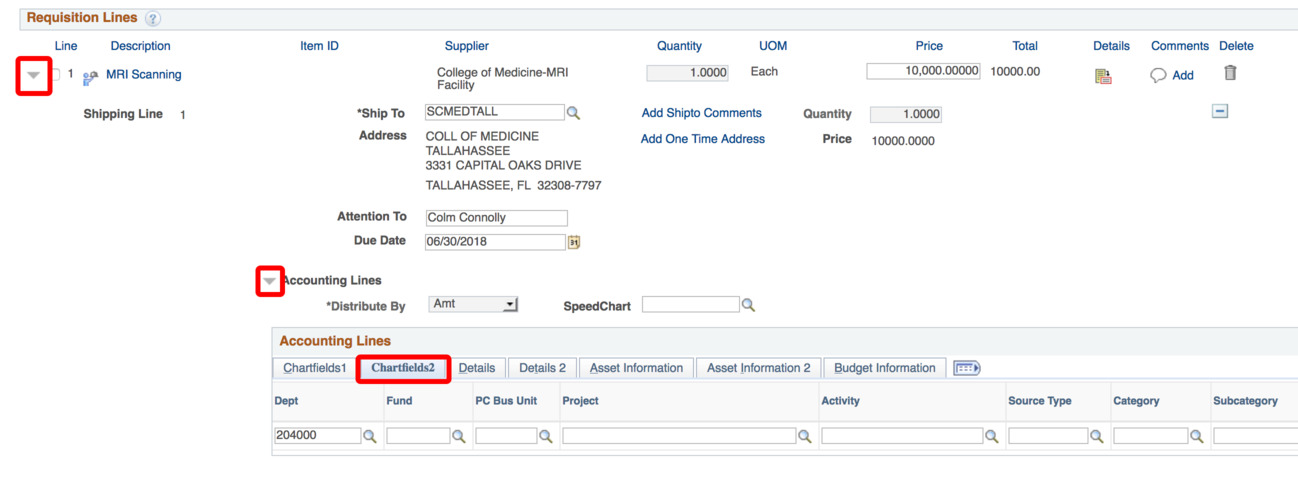
- Enter the appropriate department ID, fund and project combination in the Chartfields 2 tab.
- NOTE: A project must be on its own requisition. A requisition can not include multiple projects or a project and multiple non-project funds.
- A requisition can include multiple non-project combinations (including optional chart fields).
- Expand the lines using the small grey arrows and then select the “Chartfields 2” tab.
- Repeat steps 13.1 and 13.2 for all lines in the PO.
- When you are ready, scroll to the bottom and click on the Save & submit

- The standard approval workflow will be initiated. Once the requisition is fully approved, it will become a purchase order and will be dispatched to the vendor when the applicable system processes run throughout the day.
Last Updated: Wednesday, April 11, 2018 at 5:40 PM